Pages

Tuesday, August 24, 2010

Day 12# Simple Rose Brooch


Even a simple Brooch can change your looks. A simple dress will look different with a simple flower corsage. I adore with Mrs O looks. She looks gorgeous when she wear a simple cutting jacket with a simple floral corsage. I posses to make fabric rose corsage in a various size, color, motif and in a various fabric. This Brooch available at tobucil, its a small nice book and craft shop.

And here i want to share a simple tutorial to make a fabric rose brooch.


Materials and tools you need are :


You need Twist fabric rose or folded ribbon rose,
pin,
needle, sewing threads and glue gun.


What should we do now?
There are two methods to make this simple brooch

By sewing the pin on the rose


Placed in the pin in the middle of the rose


Start sewing along the pin


By glue gun

Put a little glue on the pin

Placed your rose on it.

Reverse your brooch, with your thumb pressed the pin

Now you can change your looks

Day 11# Twist Ribbon Rose


What a beautiful Sunday morning. The sun shine through the window and the birds sing. Its really great to start the day. I need flowers to make my day more beautiful. A rose flowers could be better. In this tutorial i decided to make twist ribbon flower. Its Very simple to follow
the instruction.


Materials and tools you need are:

Ribbon, round shape felt fabric and
gun glue or fabric glue.
You can also use fabric, cut 5 cm along
the fabric width
.


Instructions


Twist your fabric

Provide round shape felt fabric, We'll gonna
use it as a base
.

Put a little glue in the middle, paste the edge
of the fabric.

It will be a centre of the flower

Twist the fabric ribbon then turn on to the left,
put a little glue, then paste it.


Do the same thing until all your ribbon out.
Attach the end of the ribbon at the rear base.
Look, It's beautiful, isn't it?

Saturday, August 21, 2010

Day 10# Doughnut Pin Cushion


I love sewing. Now, I'm desperate in pin cushions needed. It's a very useful sewing accessories. I really need it to take hold needles and pins easily, and keep them tidily and also easily to collect them. I always lost them and falling onto the floor when I'm sewing, then i should buy again and again. Its fun and easy to make pin cushions. You can create in a various shapes, size and forms. You can also put any decoration, embroidery and any other applique.
This time i want to share with you how to make doughnut pin cushions.


The materials and tools you need are :

Felt fabric in a various color, Dacrons or cotton,
sewing threads,
scissors, pencil or pen and doughnut template.


Instruction :

Placed folded felt fabric on the floor or table,
put the template on it.


Mark with a pen or pencil along the outer and inner circle

Then cut along the outer and inner lines

You will have two pieces ring like

Sew with feston stitch, start from the inner circle


Do the same thing with the outer circle

Leaves 3 cm or 4 cm to insert the Dacrons or Cottons

Insert Dacrons or Cottons as a filler.
Actually saw dust, sand and coffee ground
could use as a filler.
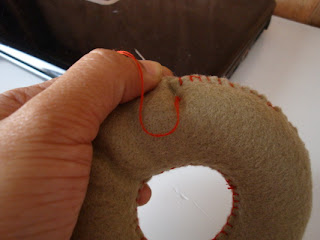

Then sew it shut

Finally, you can decorate in any way you want
with beads, ribbons, button, or any other applique.
This time, I'll decorate with felt fabric to make
melted chocolate effect.


Cut 0.5 cm width felt.
By using glue gun, stick your cutting felt on the doughnut.


Happy Sewing !!!

Day 9# Needle Book Binding


I need something to organize my sewing needle. I decided to use my felt fabric to make needle book binding. Its easy to make and easy to take wherever you go.


The materials you need are :


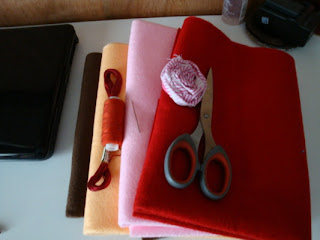
Felt fabric in any color, sewing thread or embroidery yarn,
scissors, sewing needle and corsage or anything else to decorate
.


The instruction :

First, We'll gonna make sheets insertion.
Placed felt fabric on the table,
then measure 10 cm to 20 cm.
You can take your own size.


Cut according to your size

You need 3 pieces felt fabric with the same size
and different color (or the same color),
and You'll have 6 sheets insertion.
If you take 2 pieces felt fabric then you'll have 4 sheets.


You need 2 pieces felt fabric with different size.
I take 9 cm to 20 cm for and 14 cm to 20 cm.
Doesn't matter if you take different color or the same color.


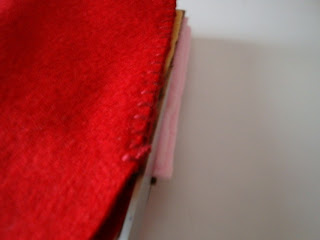
Combine both pieces with feston stitch.

You will have an envelope

Oblique cutting the edges

Placed the sheets insertion and closed envelope together.

Bind this book together.
First you have to fold all sheets in half
then mark with a pen or pencil.
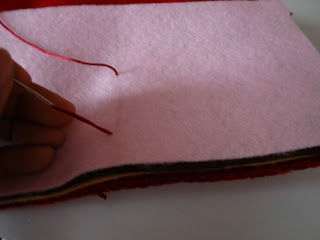
Start sew from the middle, pull it to the back side,
leaves an extra yarn on the edge.

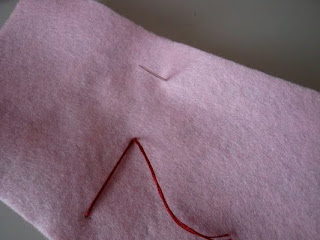
Pull 3 cm to 4 cm horizontally to the right side.
Pull the needle to the front side.


Insert the needle in the middle (first place).
Pull into the back side


From the back side, pull 3 cm- 4 cm horizontally
to the left side.


Then pull the needle into the front side

Cut the yarn, leaves an extra yarn on the edge

Tie it together with your knot. Cut the extend yarn,
leaves about 1 cm to 2 cm.

Fold in half, then trim the edges

Now you have sewing needle bookbinding.
You can decorate your needle bookbinding as you like.


You also have a pocket to put your sewing thread
or embroidery yarn


Put your needle into the sheets insertion.
Now it will more easier for you to take your needle
everywhere you go