Pages

Thursday, June 28, 2012

Tracing Class


Tracing? It`s familiar to me. I do this technique when i sew. And when i was ten or eleven years old, i also do this technique to draw a map. You need tracing paper to transfer the image to another surface as well as part of an established system. You can use tracing for sketches or any finished artwork. Shading is also fun to do, and i have to learn more. Shading can develope a volume by recognise the pattern of the light, medium  and dark value of the subjects. Thanks to Tanto for teaching me this.

Friday, June 15, 2012

DIY : Two Layers Batwing Blouse


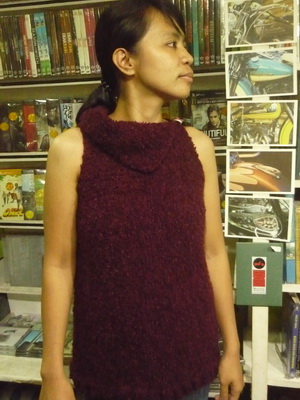
A simple project made two weeks ago, in a mid time I'm doing  knitting vest project. Its very simple and easy to followed. There are many kind of fabric you can use, for example: siphon, haicon, double haicon or cerruti. There are also two kind of fabric width, 115 cm and 150 cm long. Different width will result different arm length.

Here are the instructions :
  • Measure your hip (mine 104 cm). 
  • The fabric length you need is 2.5 m,  to make a 63 cm long blouse, and in this project i take fabric with 115 cm width
  • Fold the fabric in the middle. Cut along the width. Now you have a fabric with 1.25 m lenght, with two sheets of fabric.
  • Then, divide the length in two parts, each 62.5 cm (1.25/2= 62.5 cm). Mark both sides. 
  • From that point, measure to the right side along of your fabric width.  [(width - 30 cm)/2], mine [(115 - 30)/2]= (85/2) = 42.5 cm . Do the same thing from the other point to the left side with the same  size. Sew along the size in both sides. Don't forget to pin it, to place in the fabric when you sew.  You will have unsew part in the middle.
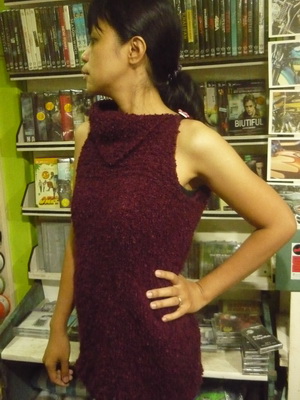
  • From the middle part, measure [width-(hip/2)], mine [115 - (104/2]/2 = [115 - 52]/2 = 63/2 = 31.5 cm. From this point, measure 27 - 30 cm down, to shape the armhole. Then, sew from this point till the bottom. Don't forget to pin it to make the fabric place in when you sew it. Do the same thing on the other side. Now you will have a hole for the bodice and also the arm hole. Doing this instruction only in one part.
  • At the other part you will have unsew part. Then, take one sheet of fabric, reverse both side. 
  • 8. Trim the  edges. Now you have two layers bat wing blouse. First, you have to measure you're blouse length and you
  • Feel free to email me,  to get the diagram.
Thanks again to Eline Bunda ARC, to become my model. You look Gorgeous wear this blouse.

Monday, June 11, 2012

Knitting Vest


Sometimes we need to take a break from anything that bother you. Whether your problem or your routine. We need to pause the time and refresh our mind. Especially when you feel uncomfortable with yourself, lost your confident and the worst thing is when you think that you close to the death. It is a horrible thought and take your energy away.

Doing this project help me to take a breath, stop the time, refresh my mind and turn my energy back. With  a simple design and  no pattern require, i hope i can finish this project not too long. Considering  i have unfinished project befrore, a baby sweater for my little pal, pasha (now, he is not a baby anymore), i was worried that i couldn't finish this project shortly. I also have no experience to knit a vest,  I thought it will need several weeks or even months to finish it. But, i was wrong. I only need two weeks, three days to knit  the bodice, a day to shape the arm hole and collar and a recess time in between it (hahaha, as usual. But this time, I do not need to put my work on my knitting basket for too long).
 

And now,  I am proudly present my first knitting vest.

Thank you to Eline Candra Bunda ARC for become my model. You are very talented model, and i recommend you to be Indonesia Next Top Model. Bravo :)