Tracing? It`s familiar to me. I do this technique when i sew. And when i was ten or eleven years old, i also do this technique to draw a map. You need tracing paper to transfer the image to another surface as well as part of an established system. You can use tracing for sketches or any finished artwork. Shading is also fun to do, and i have to learn more. Shading can develope a volume by recognise the pattern of the light, medium and dark value of the subjects. Thanks to Tanto for teaching me this.
Thursday, June 28, 2012
Tracing Class
Tracing? It`s familiar to me. I do this technique when i sew. And when i was ten or eleven years old, i also do this technique to draw a map. You need tracing paper to transfer the image to another surface as well as part of an established system. You can use tracing for sketches or any finished artwork. Shading is also fun to do, and i have to learn more. Shading can develope a volume by recognise the pattern of the light, medium and dark value of the subjects. Thanks to Tanto for teaching me this.
Friday, June 15, 2012
DIY : Two Layers Batwing Blouse
A simple project made two weeks ago, in a mid time I'm doing knitting vest project. Its very simple and easy to followed. There are many kind of fabric you can use, for example: siphon, haicon, double haicon or cerruti. There are also two kind of fabric width, 115 cm and 150 cm long. Different width will result different arm length.
Here are the instructions :
- Measure your hip (mine 104 cm).
- The fabric length you need is 2.5 m, to make a 63 cm long blouse, and in this project i take fabric with 115 cm width
- Fold the fabric in the middle. Cut along the width. Now you have a fabric with 1.25 m lenght, with two sheets of fabric.
- Then, divide the length in two parts, each 62.5 cm (1.25/2= 62.5 cm). Mark both sides.
- From that point, measure to the right side along of your fabric width. [(width - 30 cm)/2], mine [(115 - 30)/2]= (85/2) = 42.5 cm . Do the same thing from the other point to the left side with the same size. Sew along the size in both sides. Don't forget to pin it, to place in the fabric when you sew. You will have unsew part in the middle.
- From the middle part, measure [width-(hip/2)], mine [115 - (104/2]/2 = [115 - 52]/2 = 63/2 = 31.5 cm. From this point, measure 27 - 30 cm down, to shape the armhole. Then, sew from this point till the bottom. Don't forget to pin it to make the fabric place in when you sew it. Do the same thing on the other side. Now you will have a hole for the bodice and also the arm hole. Doing this instruction only in one part.
- At the other part you will have unsew part. Then, take one sheet of fabric, reverse both side.
- 8. Trim the edges. Now you have two layers bat wing blouse. First, you have to measure you're blouse length and you
- Feel free to email me, to get the diagram.
Monday, June 11, 2012
Knitting Vest
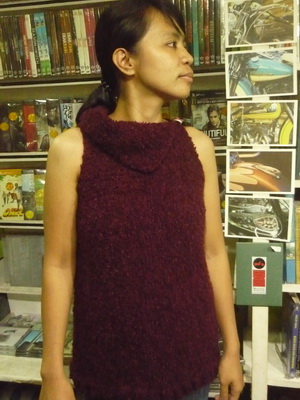
Sometimes we need to take a break from anything that bother you. Whether your problem or your routine. We need to pause the time and refresh our mind. Especially when you feel uncomfortable with yourself, lost your confident and the worst thing is when you think that you close to the death. It is a horrible thought and take your energy away.
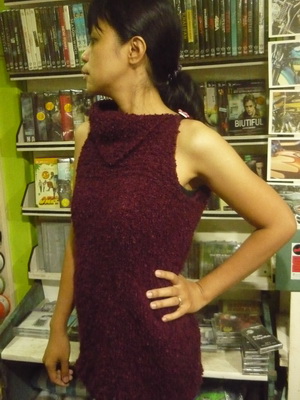
Doing this project help me to take a breath, stop the time, refresh my mind and turn my energy back. With a simple design and no pattern require, i hope i can finish this project not too long. Considering i have unfinished project befrore, a baby sweater for my little pal, pasha (now, he is not a baby anymore), i was worried that i couldn't finish this project shortly. I also have no experience to knit a vest, I thought it will need several weeks or even months to finish it. But, i was wrong. I only need two weeks, three days to knit the bodice, a day to shape the arm hole and collar and a recess time in between it (hahaha, as usual. But this time, I do not need to put my work on my knitting basket for too long).
And now, I am proudly present my first knitting vest.
Thank you to Eline Candra Bunda ARC for become my model. You are very talented model, and i recommend you to be Indonesia Next Top Model. Bravo :)
Tuesday, April 3, 2012
From The 1st Craft Swaps
Look, what i found!! How happy i am when odin give me this stuffs. Its my 1st craft swaps i followed on saturday 25th february. Its awesome, all they've done its really wonderfull. Made with passion and love, and the important thing is, we made with our own hand. That is our way to be gratefull in everyday life. This first swaps followed by twelve people, it means each people receive twelve different stuffs.
from : designbyvitarlenology's photo
Sunday, April 1, 2012
Dumpy Duck Monster
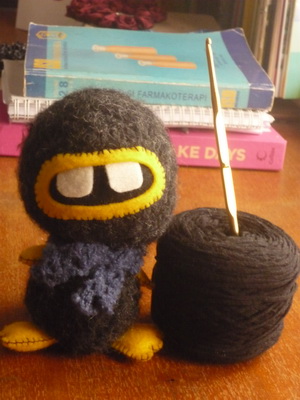
xoxoxo...what a cute monster. The Mogus help me to make the character while the body made by me six month or a year ago, i think ( really forgot when i made this body, untill i clean my room and i found it on my amigurumi box a month ago). Searching something i can use as a character on Mogu's dump felt is full of fun, coz he has big bundle dump-felt and i can dig up easily. Ta..da..i found this big mouth with big white teeth and yellow mouth. Then i put yellow hand and foot, tail and shawl to make him a goergeous looking. And what about the eyes? No need, i think. My 'dumpy duck' can see whole world with his heart
Ppssstt...i tell you a secret, I put a tail to make him stand up properly. Now he has nice looking and can stand up properly and ready to cheer you up and especially to cheer deasy . Yea, this 'dumpy duck' is a farewell gift for her. And i hope she like my present and take care of him.
Thursday, February 9, 2012
Photography Commercial Class with Sondhiar
Join this class made me know everything about how to make our product more interesting to see. Sondhiar, the tutor, very enthusiastic, kind, and give us every information we have to know about photo commercial. How to capture the image, how to take an interesting angle, how to photograph ascecories, like necklace, ring, brachelet and so on. And the best part of this class is food photography session. Hhhmmm Yummmy, we take a picture all the food before we ate it. Hopefully, there are further class and i'll be the first to join.
Here some of my work :
Food Photography session
Thanks to lily as a model, you make our class more cheerful.
Tuesday, January 3, 2012
Bee Mine
Ribbon embroidery on a card? why not!! With simple ribbon stitch and spider web rose stitch, i try to embroidery a card. I think a skewer will make my work more easier. But then, without it, the needle can insert the card easily. Always use a good quality needle. I did not knot the ribbon as usually, that's why i should pull the ribbon carefully. In the end, i trim the tail of the ribbon on the back, so it looks neat and flat. Owh, what a wonderfull world!!
Subscribe to:
Posts (Atom)